本地部署Ai大模型,Ollama+Open webui+沉浸式翻译
系统支持:Linux\mac\win
Github:https://github.com/open-webui/open-webui
本教程使用系统:飞牛OS(基于debian)
机器配置:R7 4750G、16G、无独显
使用模型:gemma2:2b (能做到流畅并快速翻译)
1:SSH连接Nas,root登录后,输入一键命令(包含ollama的open webui)
无GPU,仅限CPU模式
docker run -d -p 3000:8080 -v ollama:/root/.ollama -v open-webui:/app/backend/data --name open-webui --restart always ghcr.io/open-webui/open-webui:ollama
使用GPU模式
docker run -d -p 3000:8080 --gpus=all -v ollama:/root/.ollama -v open-webui:/app/backend/data --name open-webui --restart always ghcr.io/open-webui/open-webui:ollama
一键安装,完成后输入:https://localhost:3000 新建管理员账号密码,登录webui,
2:登录后点击头像-管理员面板-设置-外部连接(右上角弹出绿色标识:已验证服务器链接)
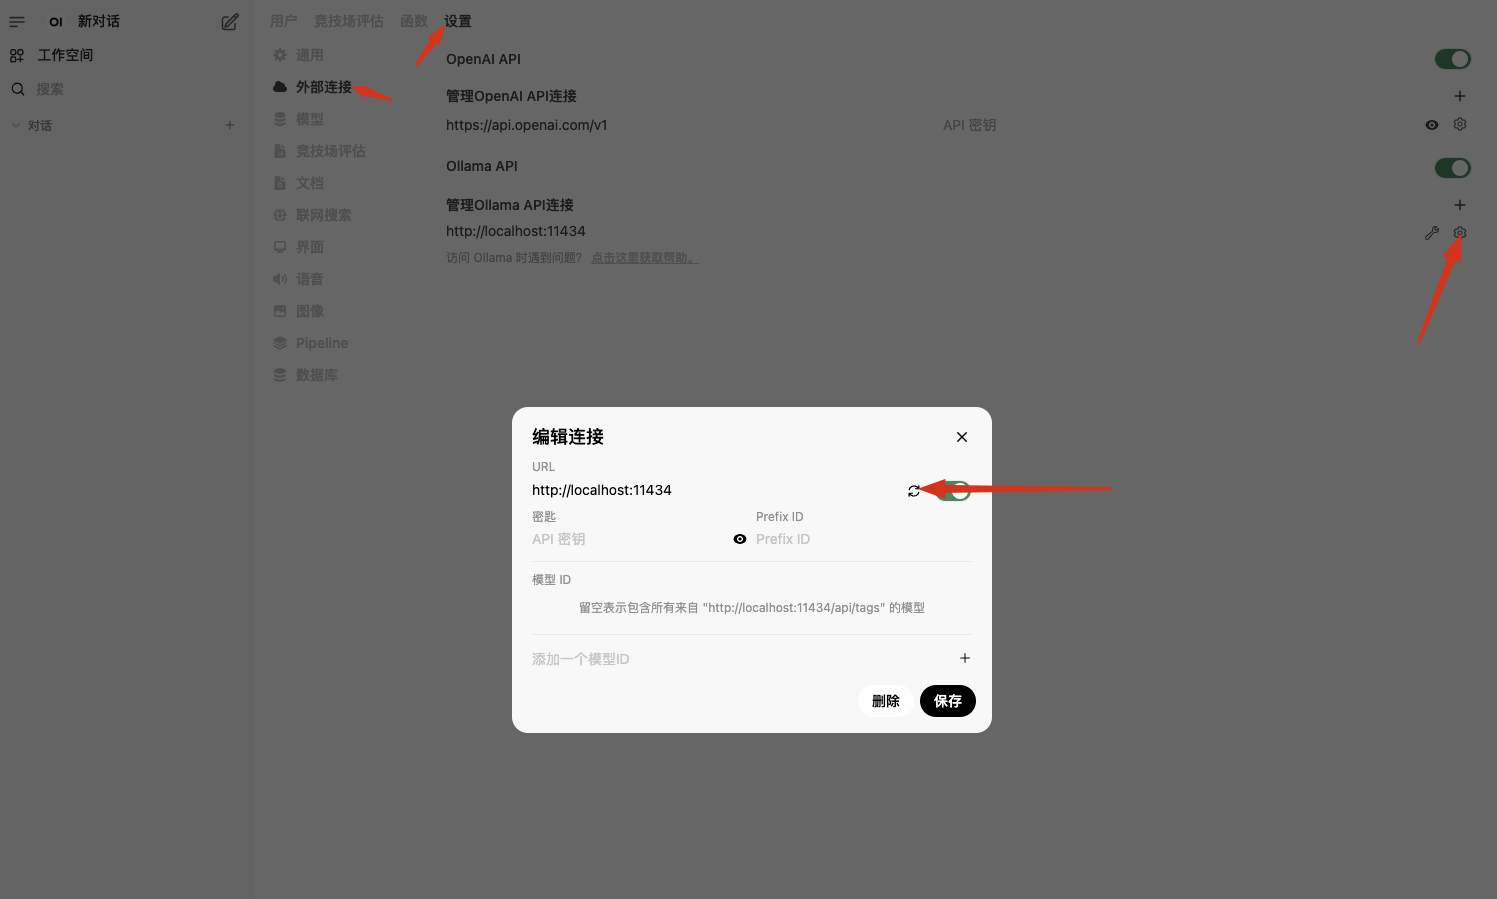
3:点击小扳手🔧,拉取模型:https://github.com/ollama/ollama 模型列表
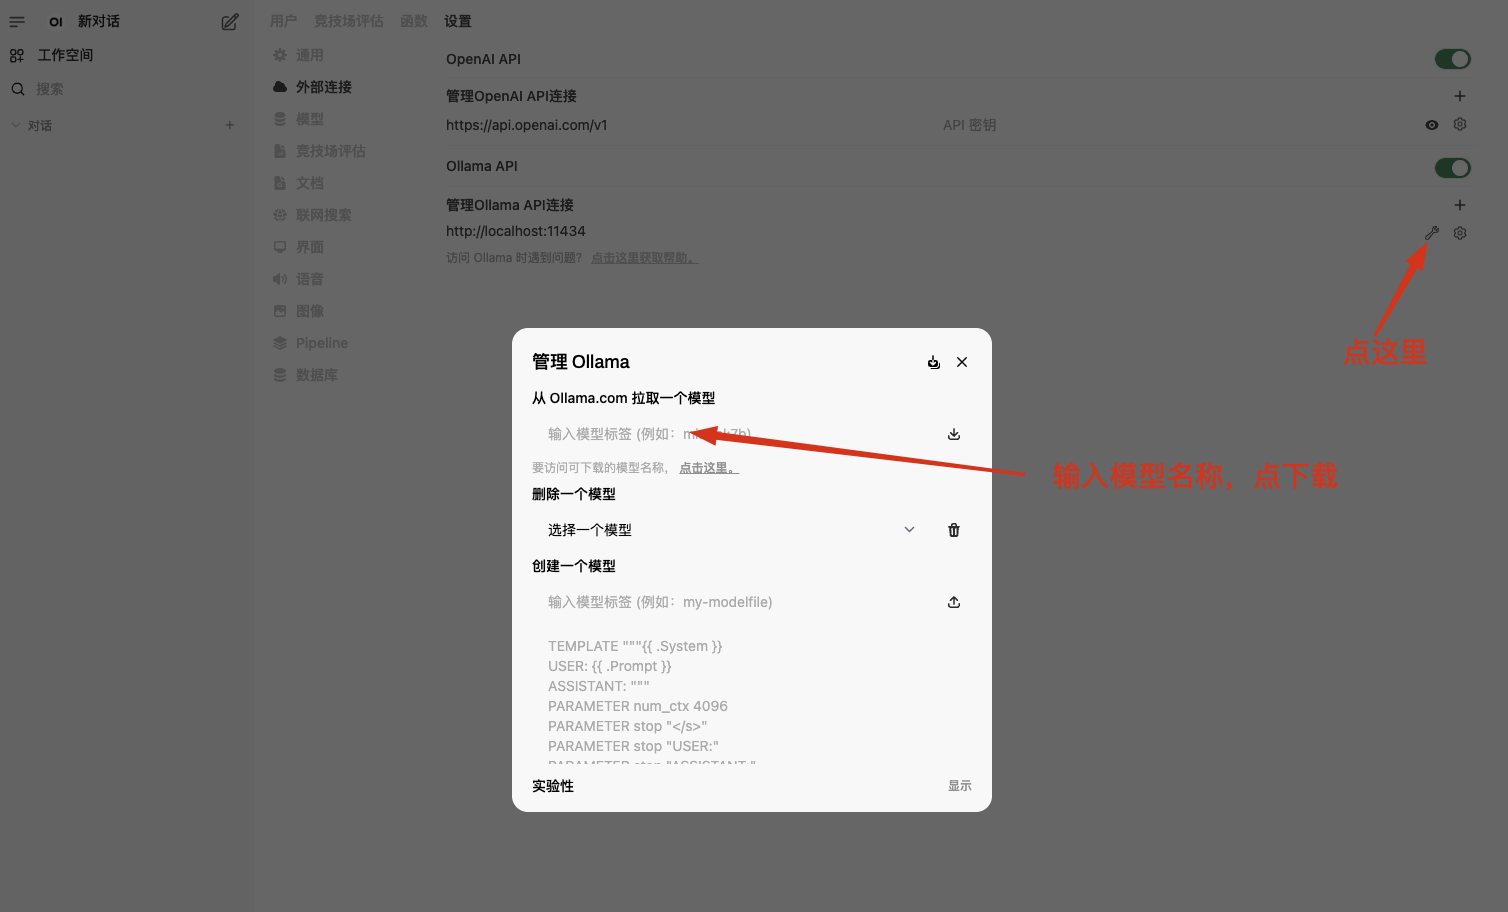
4:以gemma2 (翻译水平相对较高)根据电脑配置来选择2B或9B。可以自行测试
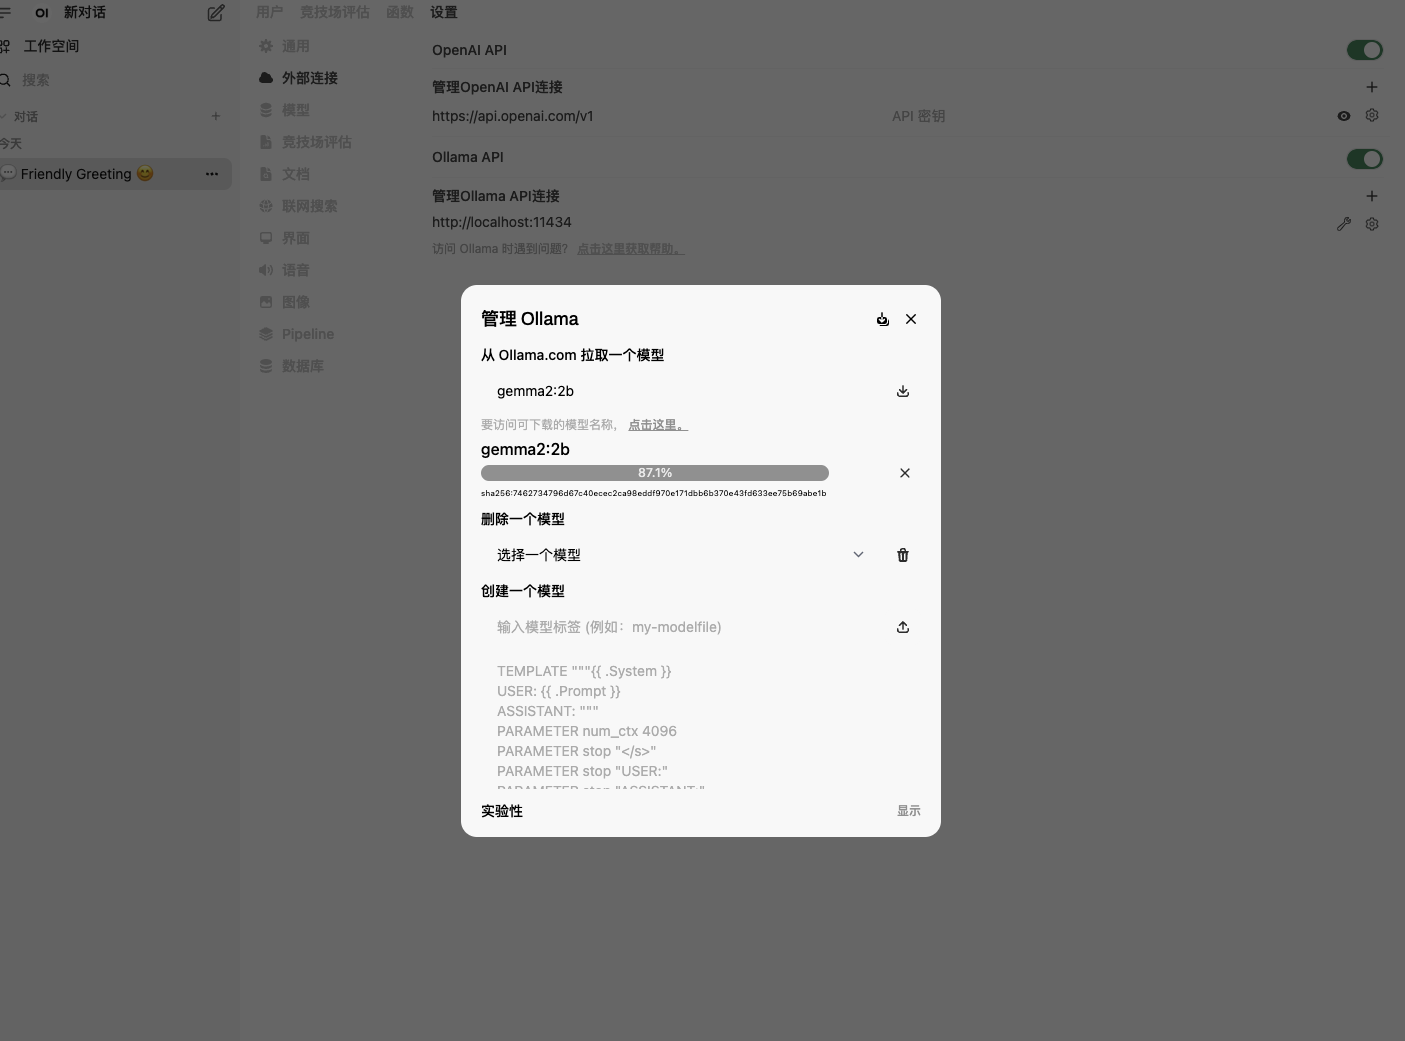
5:拉取完成后,在open webui上选择模型后,即可使用AI对话。
下面是搭配沉浸式翻译使用
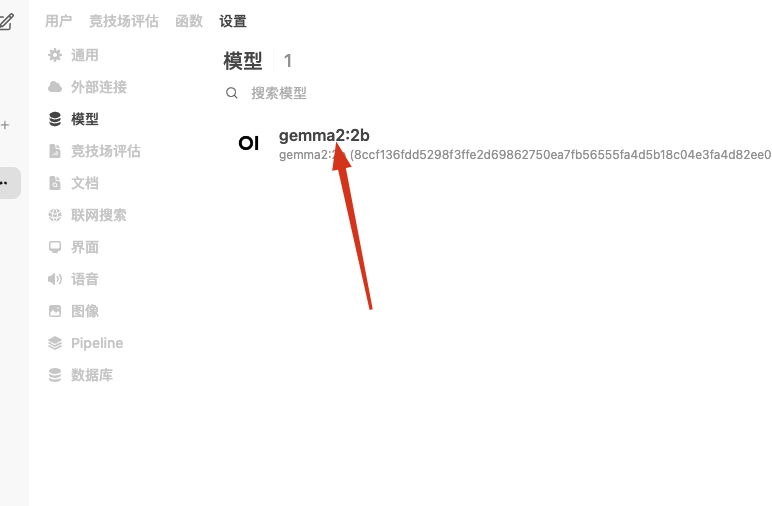
1,首先确定本地模型名称,如:gemma2:2b
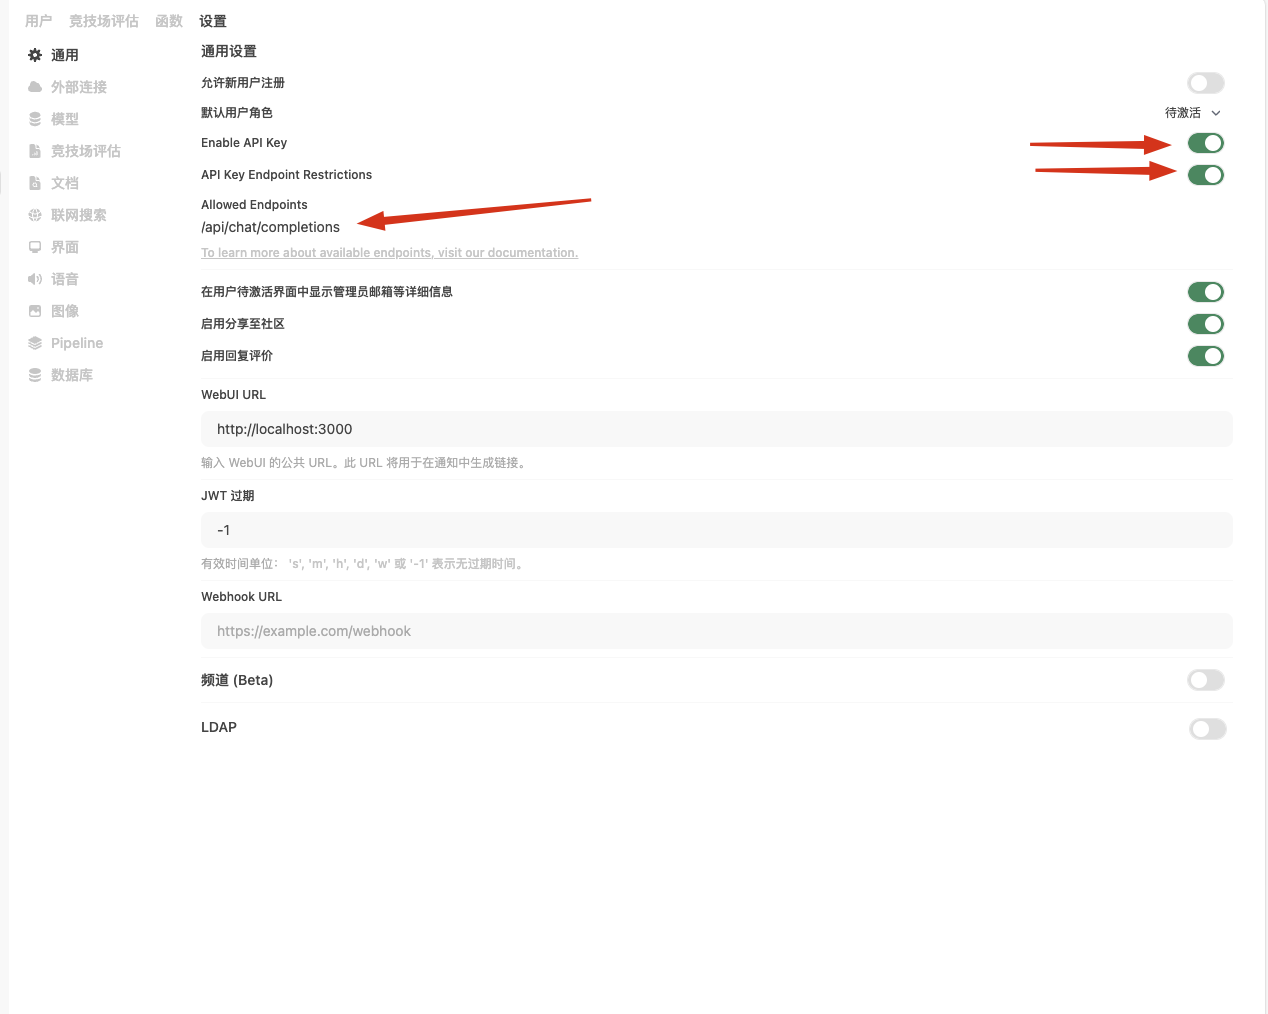
2,设置-通用-
开启Enable API Key
开启API Key Endpoint Restrictions
Allowed Endpoints 下面填写:/api/chat/completions
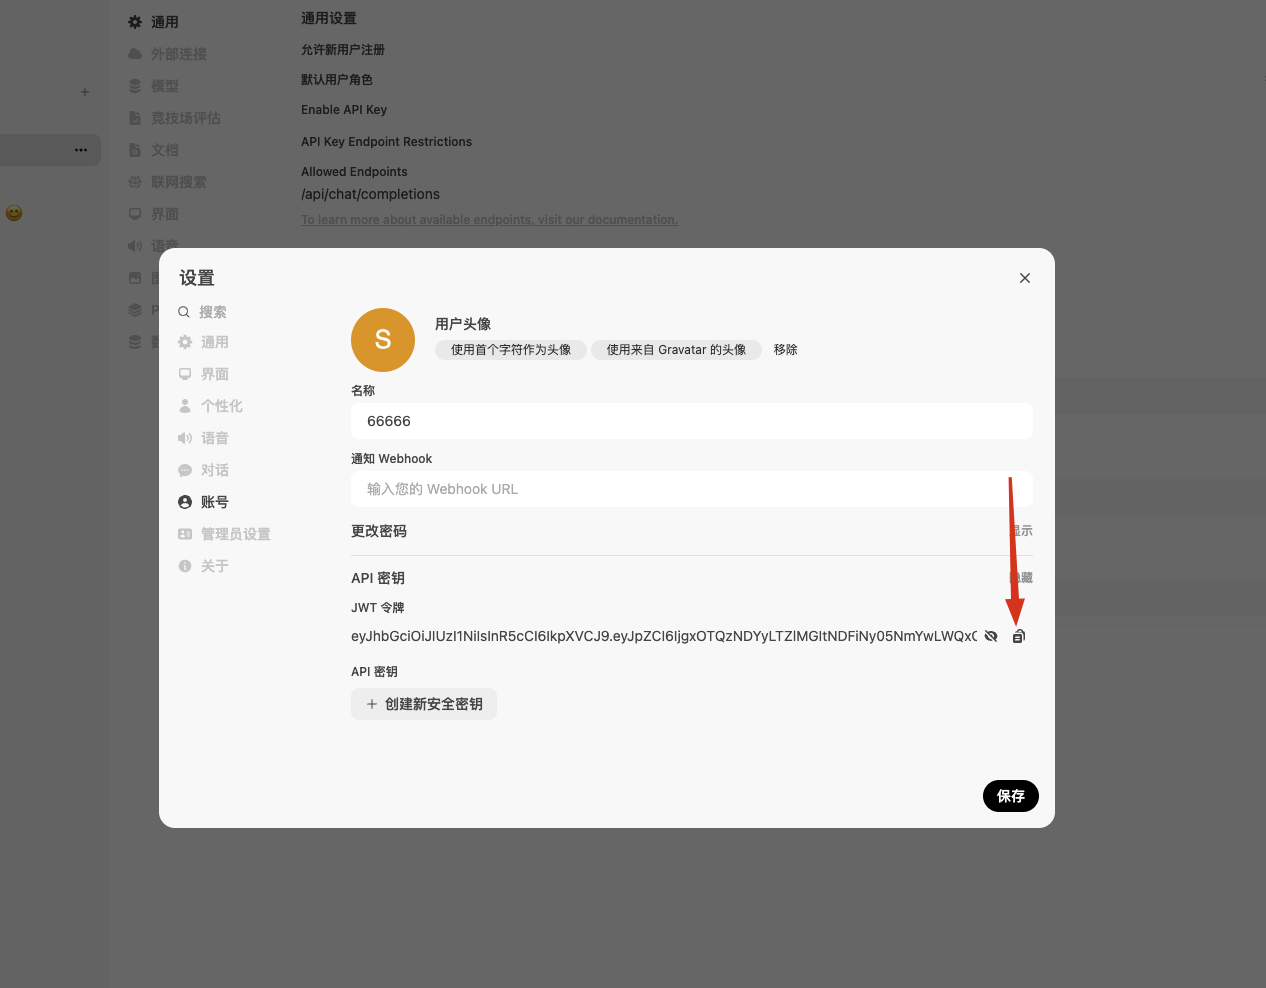
3,点击用户名、设置、账号-显示API密钥-复制API密钥
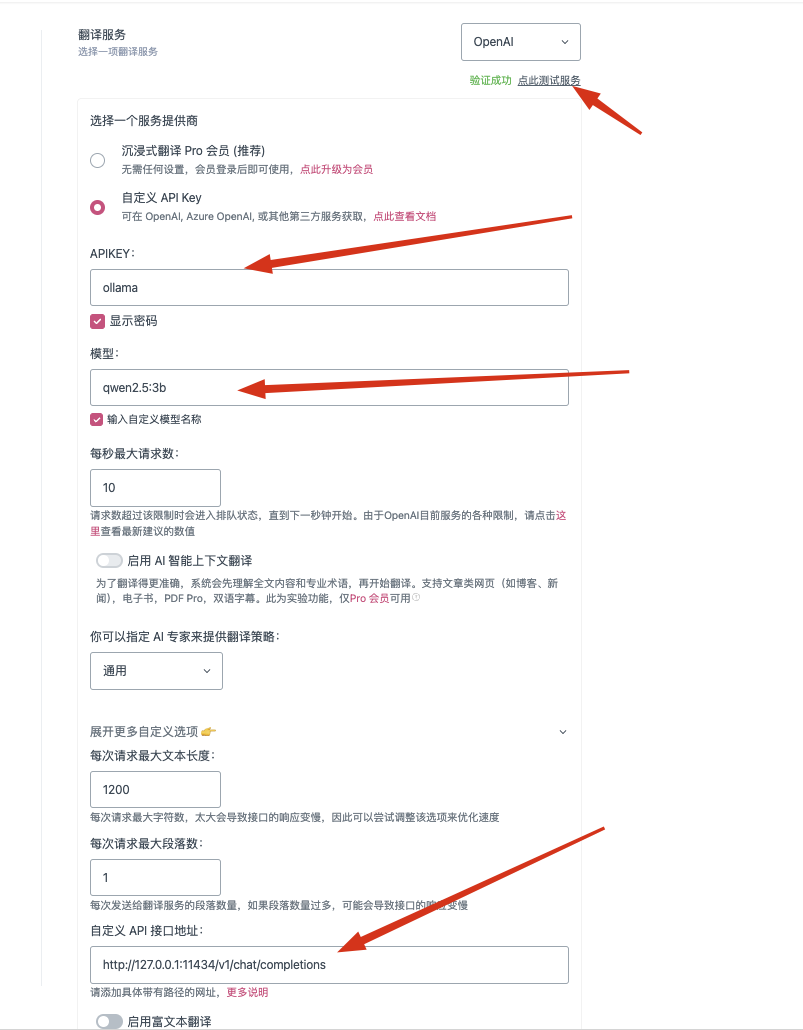
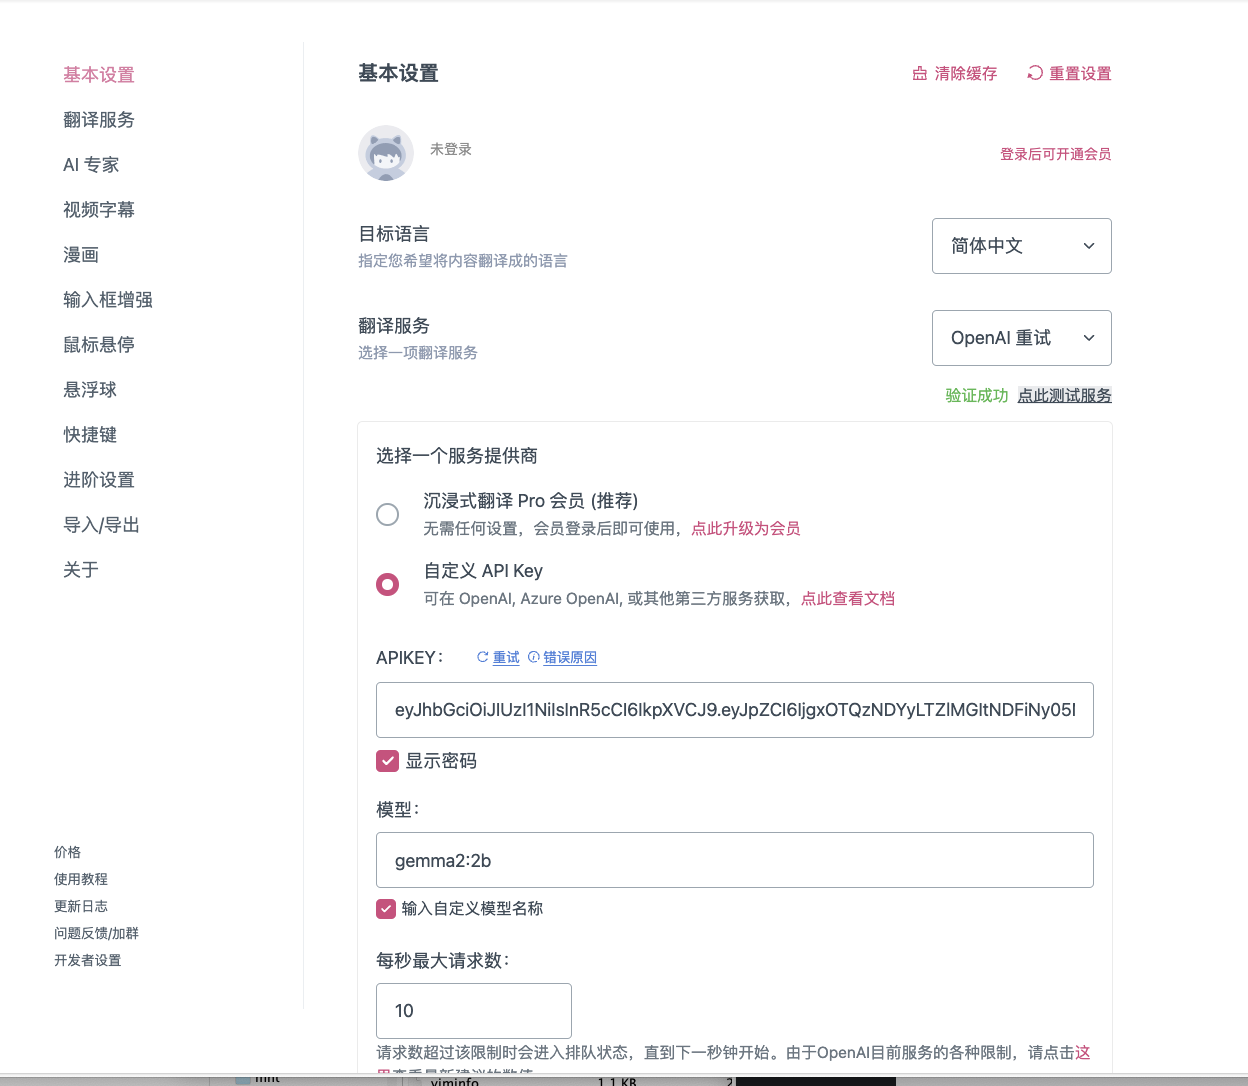
4,将以上信息填入 沉浸式翻译
沉浸式翻译填写如下,注意自定义API接口的ip,根据实际ip添加,
我的是:http://192.168.101.163:3000/api/chat/completions
然后点击:点此测试服务,验证成功即可。
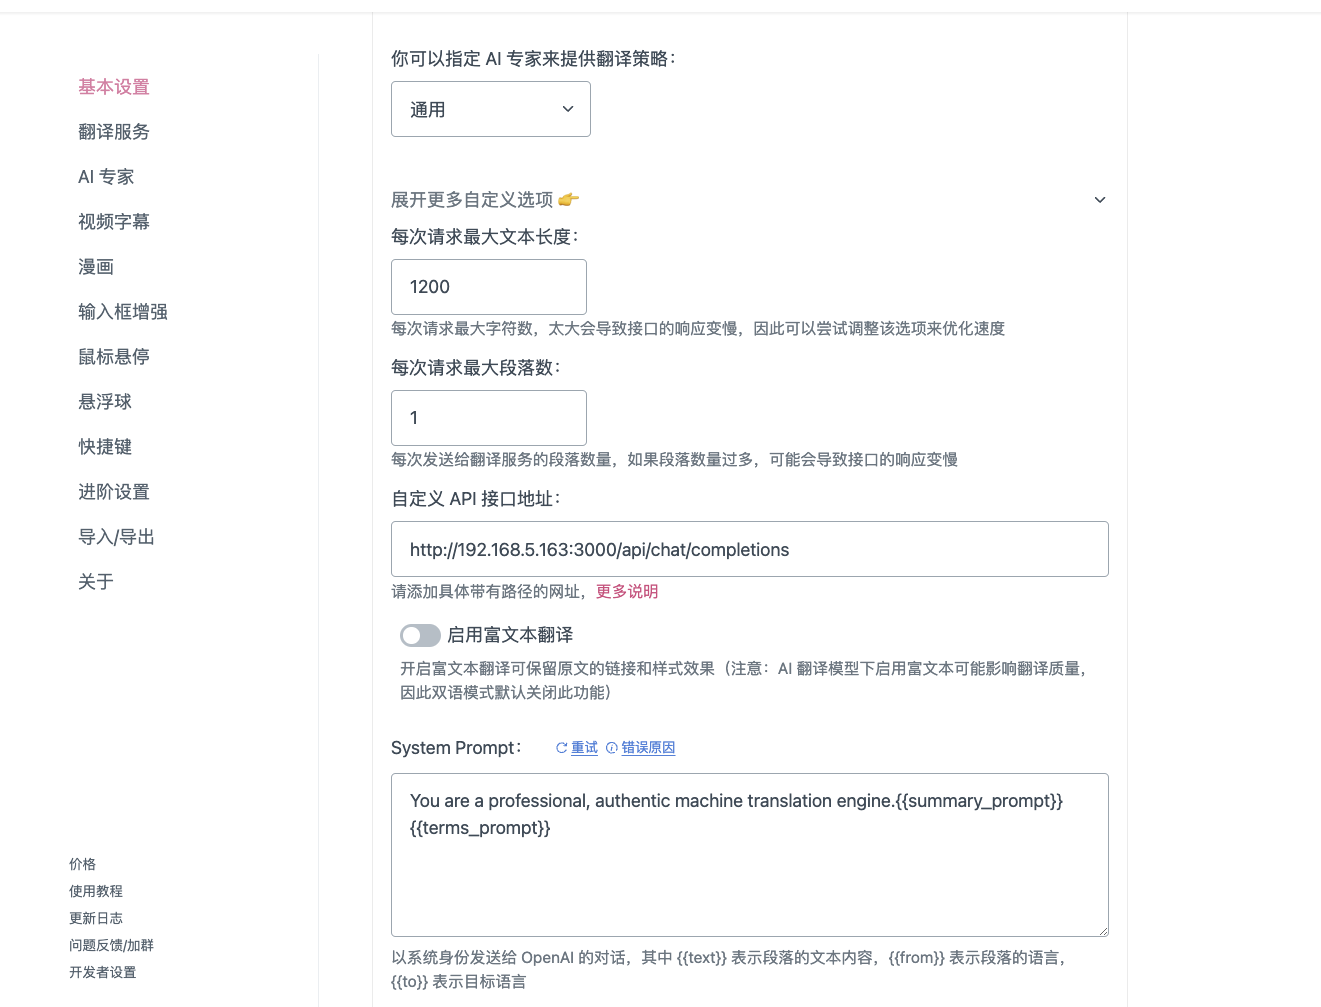
以上配置全部完成
下面是使用效果
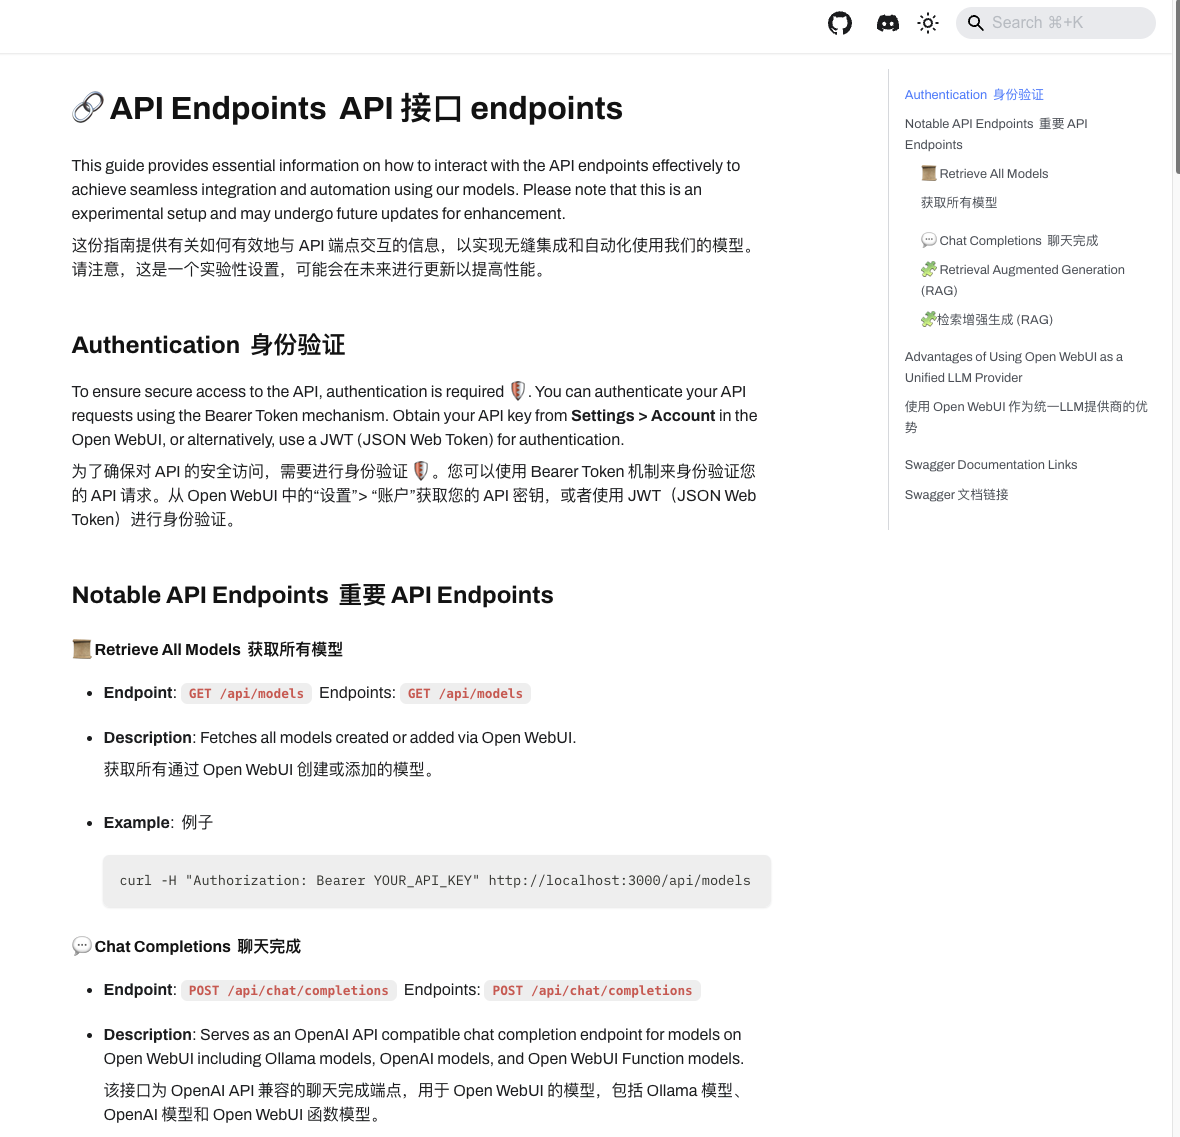
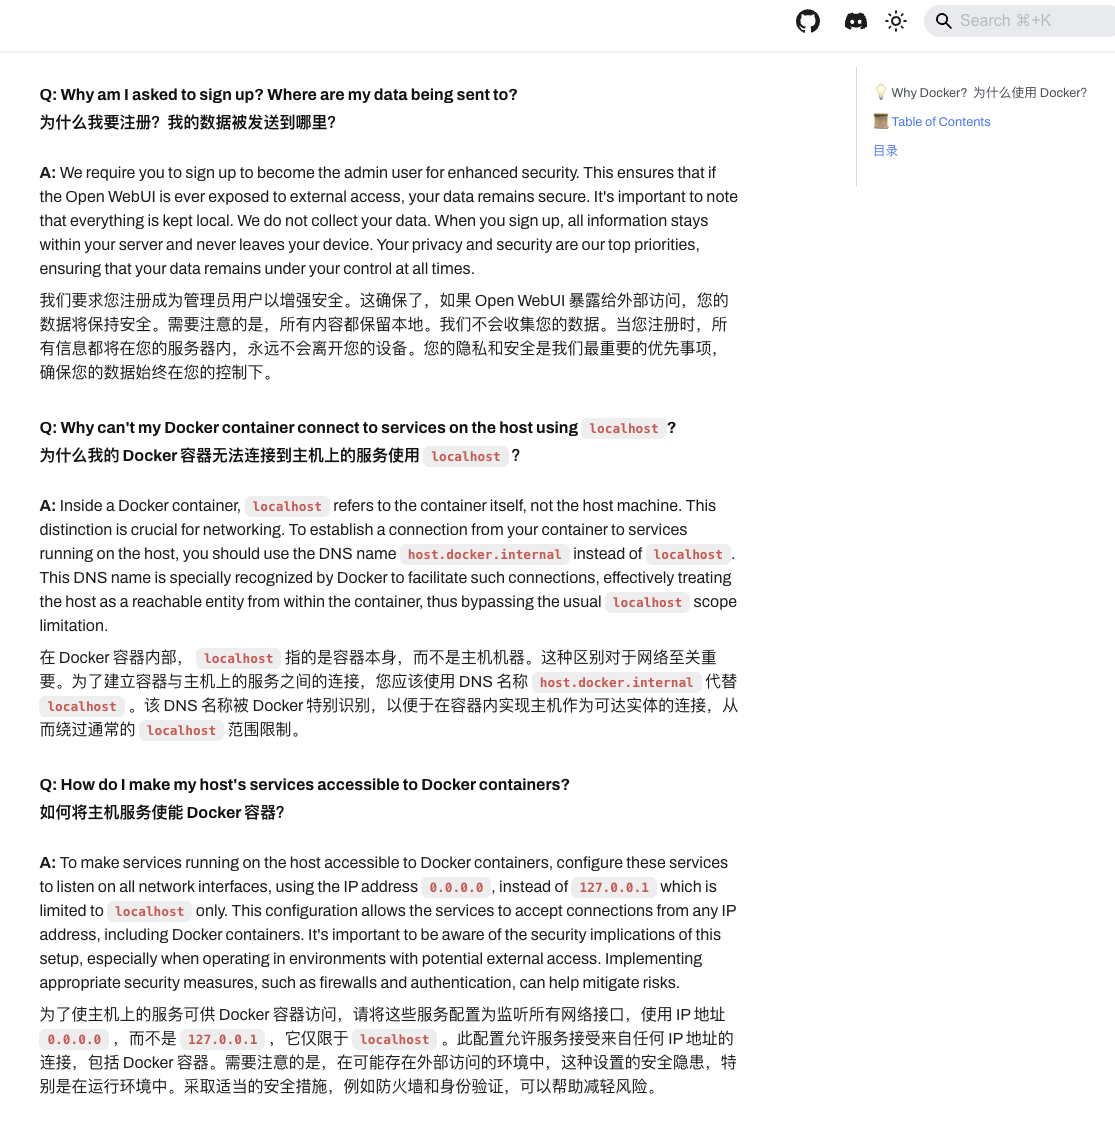
本机搭建的情况下
在自定义 API 接口地址,填写“http://127.0.0.1:11434/v1/chat/completions”
如果显示403错误的话,可以使用以下方式解决:
- Macos:
输入launchctl setenv OLLAMA_ORIGINS "*"后启动ollama APP - Linux:
输入OLLAMA_ORIGINS="*" ollama serve - Windows:
控制面板-系统属性-环境变量-用户环境变量中新建2个环境变量:变量名OLLAMA_HOST变量值设置为0.0.0.0,变量名OLLAMA_ORIGINS变量值设置为*,再启动App。
测试,出现“验证成功”就表示成功了。
